


I recently started setting up a Starlink satellite dish at my home using a Starlink Telescoping Pole.
I live in a remote area where good internet is hard to find so that this setup could make a big difference.
The telescoping pole is useful because I can adjust its height. It is important to get the dish right to catch signals from satellites far up in space so I can get the best possible internet speed.
Putting up the dish and pole took some effort. First, I had to choose the right spot in my yard with no big trees or buildings blocking the sky.
Then, I carefully placed the pole and attached the dish at the top. I adjusted the dish, making small moves to point it perfectly at the satellite.
This project is not just about getting faster internet. It’s also exciting to use such advanced technology right in my backyard.
As I worked on the installation, I felt excitement and curiosity about how much this new internet would change things for me, like making it easier to watch videos, join video calls, and browse the web quickly.
I have shared a complete Starlink Telescoping Pole Installation guide in this article. I hope it helps.
So, without any further ado, let’s get started.
Can I Install Starlink on a Telescoping Pole?
Before knowing that you can install the Starlink on a telescoping pole, what is a telescoping pole?
The Starlink Telescoping pole is a handy accessory for mounting your dish without damaging it at ground level.
With multiple sections of different height options, the Starlink telescoping pole helps eliminate the challenges faced during constant location changes and gets the clearest skies even in heavily wooded areas.
And, yes, you can easily install the Starlink on a Telescoping pole. All you need to do is follow the steps discussed below in the next section of the blog.
Starlink Telescoping Pole Installation – Step-By-Step Guide

The installation steps have been defined under two categories, i.e., ground installation and RV installation steps.
Let’s find out the best installation step for your Starlink. Here we go:
Ground Installation Steps
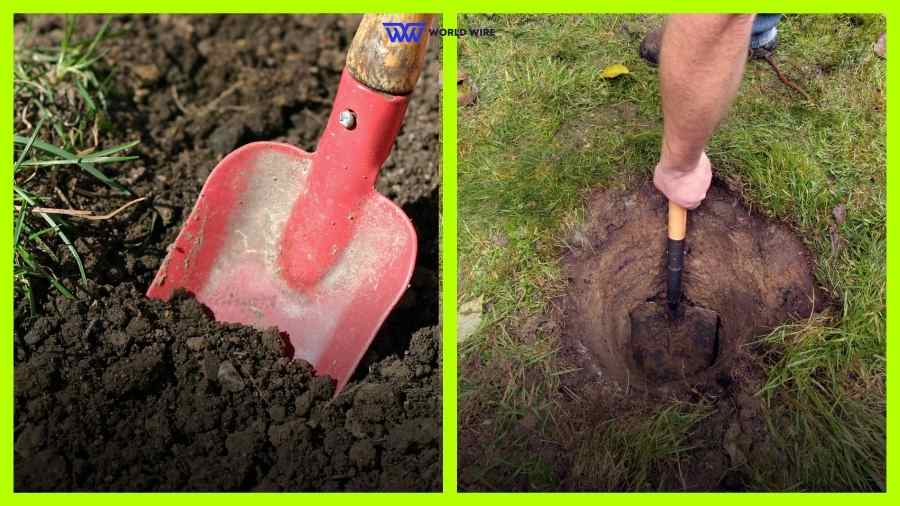
- The first steps begin with finding the best location for your Starlink with minimal obstructions. Open your Starlink app and find a clear spot.
- Next, dig a hole in a soft area of the ground. The hole should be about one-fourth the length of the telescope pole and at least one foot wide. You can add some gravel for drainage.
- It’s time to mix the concrete. Follow the package instructions and prepare the concrete. Pour it into the hole with the pole standing upright. It takes about a day for the concrete to harden completely. So, kindly ensure that you cordoned off the area and allowed the concrete to set firmly.
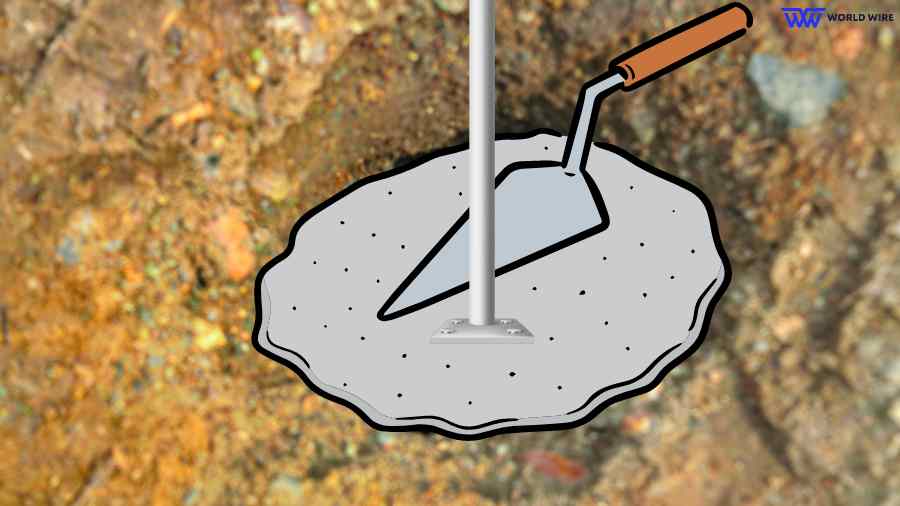
- It’s time to install the Starlink dishy adapter on the top end of the pole. You can also install the dish before placing it into the hole. However, placing it after the concrete is hardened decreases the risk of falling and damaging it.

- Kindly check for the sections on the pole. Put the dishy on first, then extend each section to your desired height.
- Fasten the dish with the adapter using bolts and ensure the dish is stable and not shaky.
- If your pole is very tall, you might need extra poles nearby to hold guy wires for support.
- The next step is to fix your ethernet cables. Depending on the distance between the installation site and the Starlink router location, you can bury the cable in the ground or run it overhead.
- Now, reconnect your Starlink. Please turn on the router and wait for it to start up. When the blue light comes on, use the app to set up Starlink again.
- Test the signal to ensure your reconnection is successful.
RV Installation Steps
For RV installation, you’ll need a pre-installed brace to hold the base of the pole.
Along with this, you will also need a bumper hitch mount that connects to the bottom of your RV’s ladder or trailer.
Now, follow these steps:
- You will need a hollow bumper hitch mount that can accept an L-shape base for the pole.
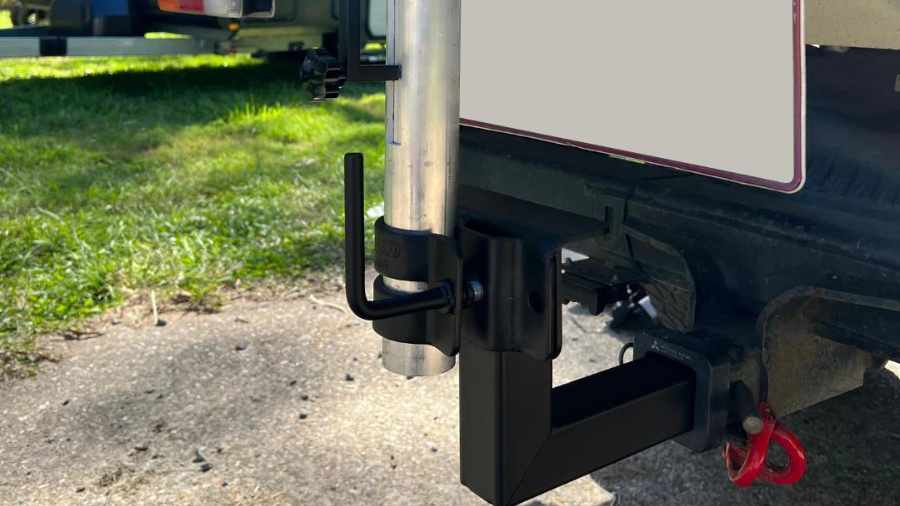
- Attach the “L” base to the pole, insert the longer end into the hollow mount, and secure it with a bolt.
- After it’s done, tighten the mount on the sides to ensure the base stays stable.
- Insert the pole into the vertical part of the “L” base. Since most Starlink poles are 2 inches in diameter, it should fit well.
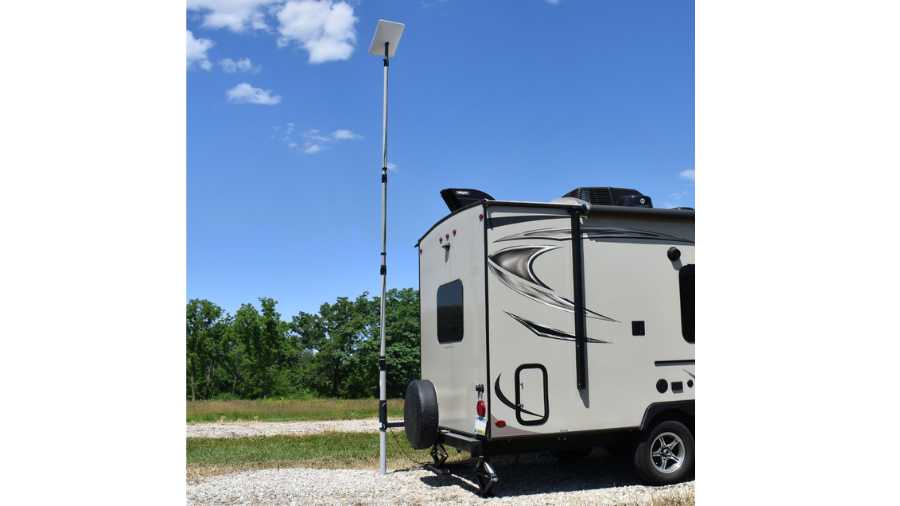
- Put the Starlink dish on top of the pole using the official adapter.
- Reconnect the Starlink system and run a speed test to ensure everything works well.
- You can also attach the pole directly to the RV ladder using U-bolts.
Starlink Telescoping Pole Maintenance and Care
Maintaining your Starlink hardware doesn’t take much effort if it’s installed properly.
However, a few things must be remembered to ensure smooth operation over time.
Clean Regularly
Wipe the pole with a damp cloth to remove dust and dirt. Avoid using harsh chemicals, as they can damage the material.
Check for Corrosion
Inspect the pole periodically for signs of rust or corrosion, especially if it’s made of metal. If you notice any, clean the area and apply a rust-resistant coating.

Lubricate Joints
Apply a silicone-based lubricant to the telescoping joints to ensure smooth operation. This prevents them from sticking or jamming.
Tighten Connections
Make sure all connections and fasteners are tight. Loose components can lead to instability or damage.
Store Properly
When not used, retract the pole and store it in a dry, covered area to protect it from the elements.
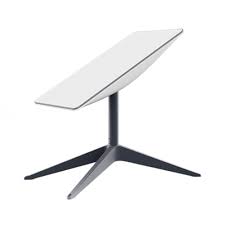
Benefits of Starlink Telescoping Pole

The Starlink telescoping pole has multiple sections, which help us adjust its height as required.
With ease of adjustability, the Starlink telescoping pole also serves another benefit. Some of them are as listed:
Portability
Portability is one of the major USPs of the Starlink Telescoping pole. It is a great option for people who travel a lot, whether in RVs or at home.
You can easily drive around with RVs and place them on the ground if you want.
Availability
Starlink doesn’t offer its telescoping mount. However, different options can work well with the new generation 2 dishy.
Here are a few options:
TowerLink Telescoping Pole Bundle for Starlink
- Made of fiberglass
- Comes pre-assembled with features like a hitch mount for RV installation, cable straps kit, and Starlink mount adapter
- Has a base diameter of 2.5 inches
Easy Up Heavy Duty Telescoping Mast
- Made of metal
- Stands 24 feet tall and has four sections with friction clamps that lock in place
- Can support up to 20 pounds
Winegard TowerLink Telescoping Pole Bundle for Starlink
- Made of fiberglass
- It comes pre-assembled with features similar to the first option
- Has a base diameter of 2.5 inches and stands 30 feet tall.”
Compatibility
It’s easy because all the telescoping poles available for Starlink are compatible with Starlink dishes. They either come with Starlink adapters or are designed to fit Starlink accessories perfectly.
Sturdy Against Wind
The Starlink telescoping poles come in different sizes. Some are as tall as 40 feet, while others are shorter, ranging from 10 to 20 feet.
These poles are made from tough materials that keep your dish steady and the pole itself secure, even in windy, rainy, or snowy conditions.
Alternative to Starlink Telescoping Pole
The alternatives to the Starlink Telescoping Pole are as follows:
Starlink Base
The first alternative is the Starlink base. If you have a plain surface with fewer obstacles and a clear sky so you can easily access the internet from the ground level, then it is a great option!
The Starlink kit includes a mount that is easy to set up on flat ground. It is movable and ready to attach.
J-Mount
This mount is popular for satellite dishes and antennas. It is used in homes with slanted roofs. The Winegard DS2000A J-mount is versatile and works well with the Starlink dish on buildings and roofs.
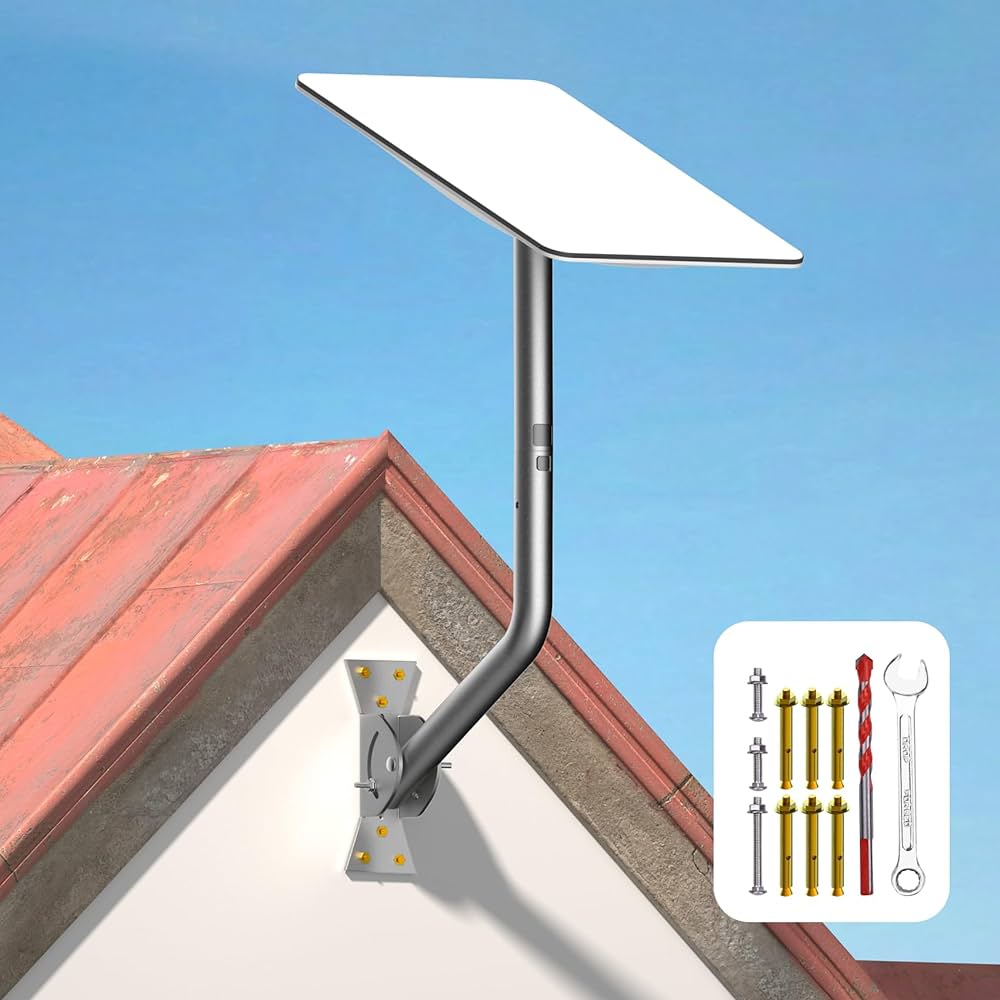
Plus, it’s sturdy against strong winds and has U-bolts to attach to the dish without drilling.
Flashing Mount
Do you want to hide cables, minimize leaks, and avoid drilling? The flashing mount is the answer. It fits neatly into roof shingles and prevents snow or rain from leaking.
Plus, cementing the shingles will end the minimal chances of leakage.
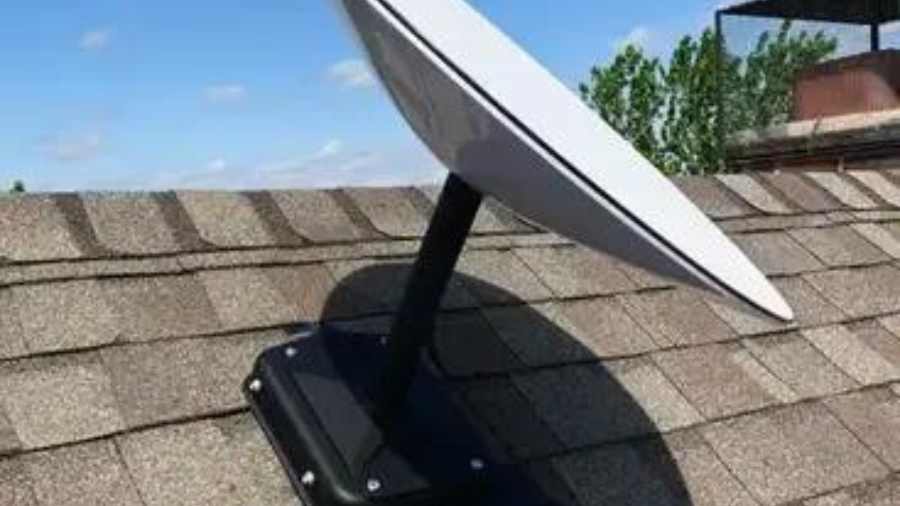
Non-Penetrating Pitched Roof Mount
This mount is perfect if you don’t want to use a drill or bolts. It sits at the top of a sloped roof and can be adjusted to fit the pitch. Cinder blocks or sandbags keep it steady without drilling into the roof.
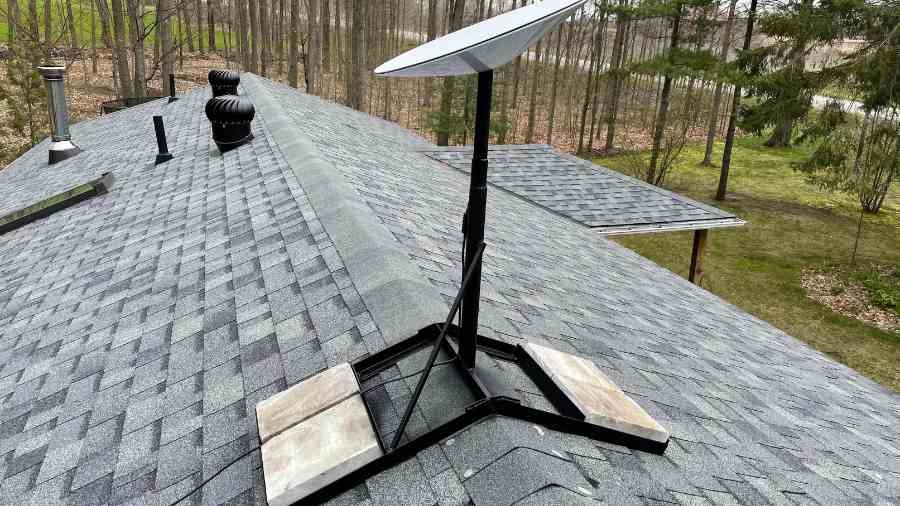
Tripod Mount
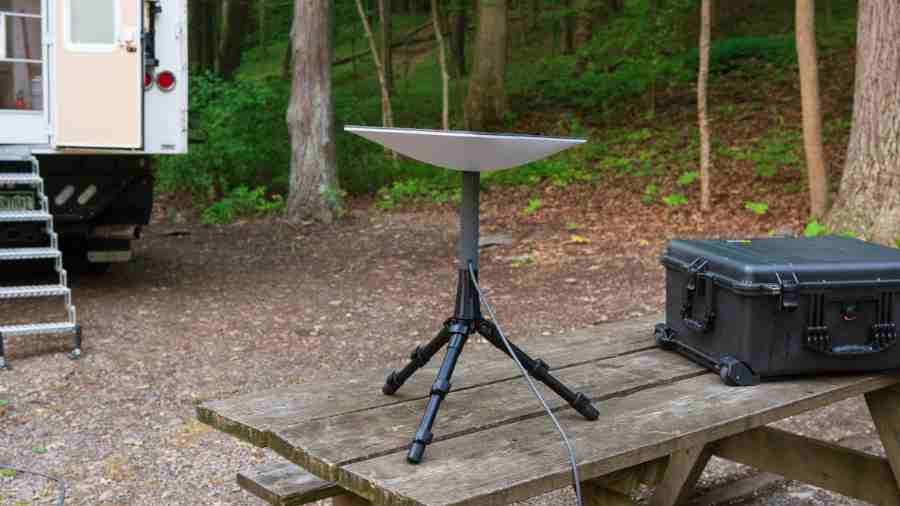
A tripod mount is ideal for flat roofs and can be anchored to the ground. However, for stability in windy conditions, you need to look for an aftermarket tripod with a heavy base.
Chimney Mount
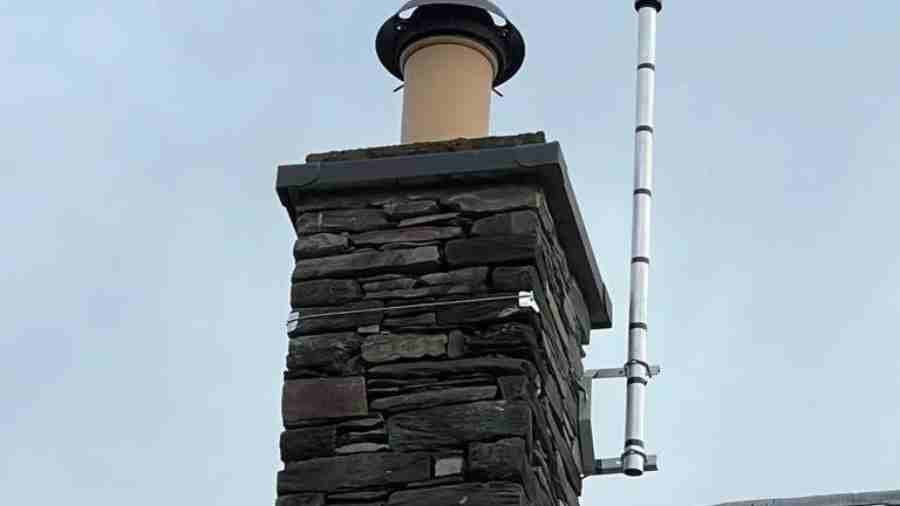
Chimney mounts are a smart choice for areas with obstacles. They attach to chimneys using strong straps and are great against strong winds.
Tower Mount
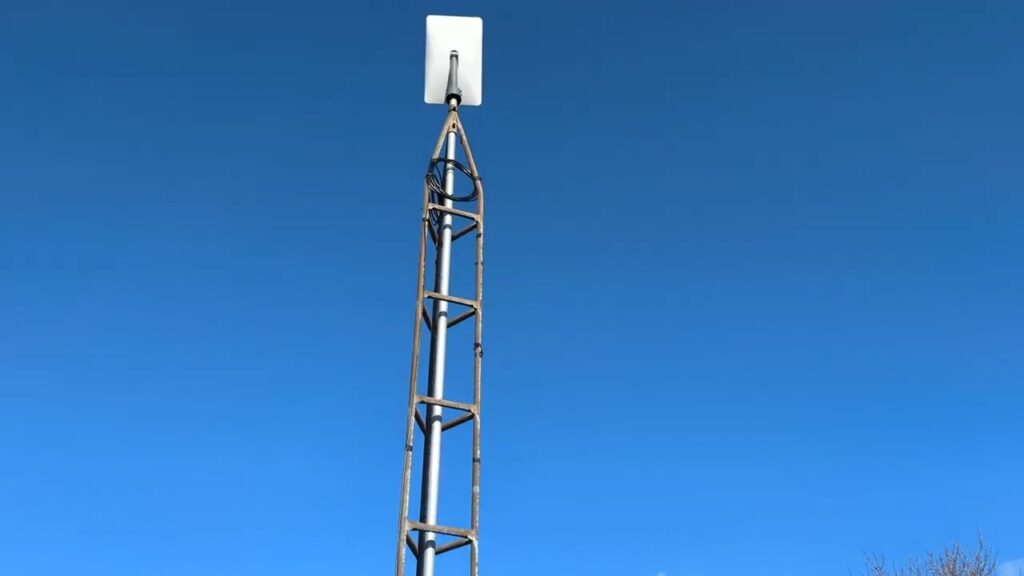
Tower mounts remove any obstacle or hindrance to the sky. With an elevation of 30 to 40 inches, they ensure your dish is obstacle-free and receives a good internet connection.
However, it requires a good investment but is worth the cost. It’s also a sturdy option compared to the Starlink tree mount.
FAQs
What is a Starlink telescoping pole?
A Starlink telescoping pole is used to mount a Starlink satellite dish. It’s adjustable in height by providing ease of adjustability.
How Much Does Starlink Telescoping Pole Cost?
The Starlink Telescoping Pole costs approximately $55.
Can the Starlink telescoping pole be used in any location?
The Starlink telescoping pole can be used in various locations, but it’s best suited for places with minimal obstructions and stable ground.
Is the installation of a telescoping pole difficult?
No, installing a telescoping is not difficult. You just need to follow the simple steps discussed above in this blog.
Can the telescoping pole withstand harsh weather?
Yes, the telescoping pole can withstand harsh weather. They are made from tough materials that keep your dish steady in any weather.
Where can I buy a Starlink telescoping pole?
You can buy a Starlink telescoping pole from various sources that sell fiberglass poles, metal poles, electrical conduit poles, or poles produced directly by manufacturers compatible with Starlink and other antennas.
Enter your email to stay updated with offers
If you can’t see the form above, click here to open the form.

Add Comment