


Wondering about Starlink cable repair? If yes, then you have stumbled upon the right article.
Starlink, the satellite internet service provided by SpaceX, has revolutionized internet access in remote areas.
Starlink’s advanced technology brings high-speed internet to regions where traditional cable or fiber-optic connections are unavailable.
However, one challenge users may face is the lack of local support for equipment maintenance and repairs.
If your Starlink equipment, such as the satellite dish or cables, gets damaged or experiences a cable cut, then fixing it could be challenging, as reaching out to Starlink’s official website for cable issues may result in longer response times.
Last week, I was somewhat surprised to discover that my dog had chewed through my Starlink cable!
At first, I was worried about losing my internet connection, but I rolled up my sleeves and got to work.
I managed to patch it up myself, and thankfully, everything is back to running smoothly now. It was quite the adventure in home repair!
In this article, I have shared a step-by-step Starlink cable repair guide. I hope this helps.
So, without any further ado, let’s get started.
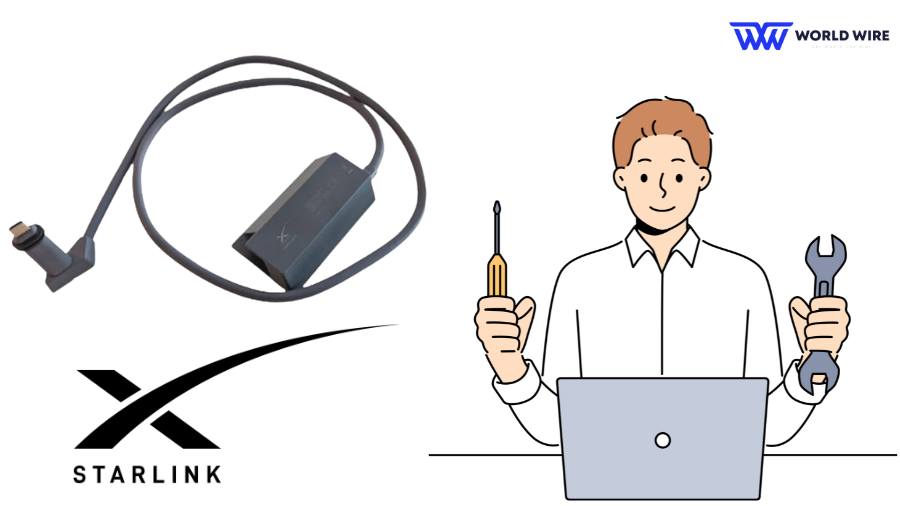
Can I Perform Starlink Cable Repair Myself?
So, first, chill and relax because, yes, you can repair the Starlink cable yourself.
Starlink utilizes a proprietary cable between the dish and router, but it’s based on a Cat 6 networking cable, making it repairable with the right tools and parts.
You will only need a couple of specialized tools and parts, which are easily available at your local hardware store.
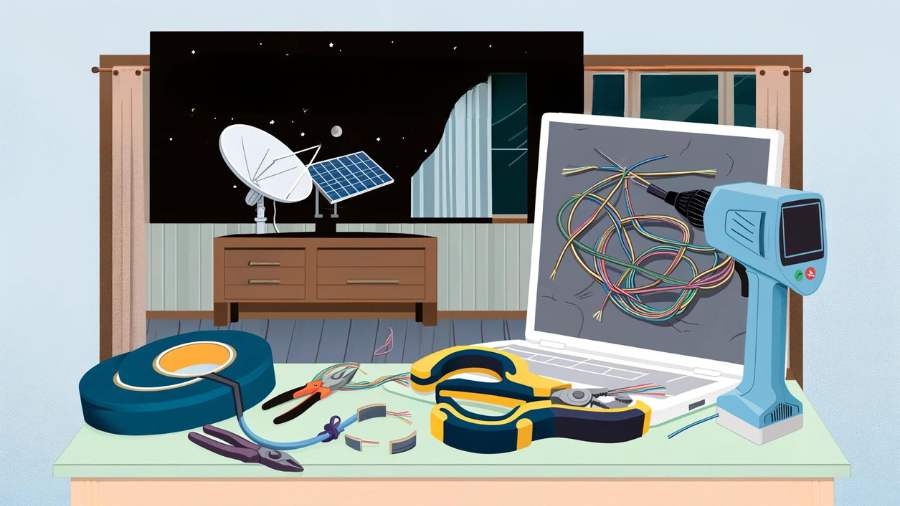
Here’s the list of tools you will need:
- Wire cutter
- Wire stripper
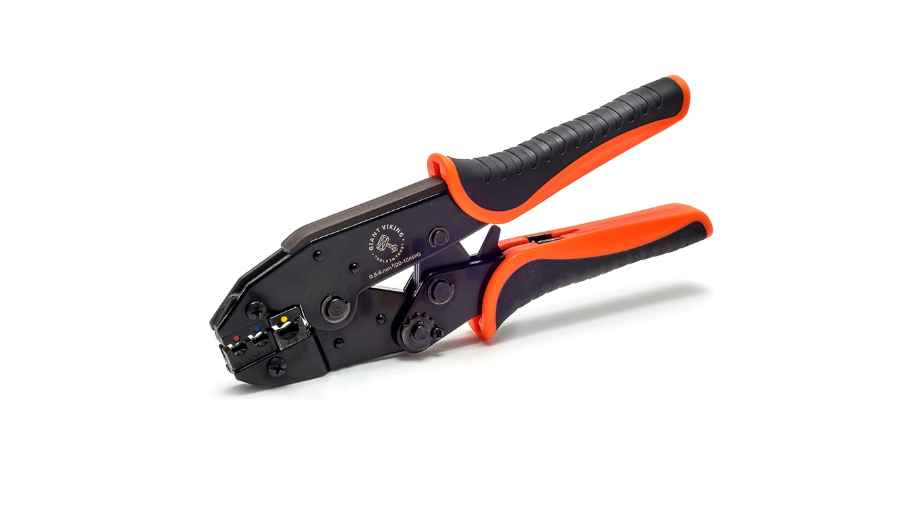
- Crimper
- Cat 6 jack ends
- Wire nuts
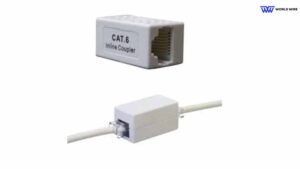
- Cat 6 coupler
- Outdoor enclosure
Starlink Cable Repair – Step-By-Step Guide
So, let’s begin with the mission of fixing your cable. Here you go!
Disconnect your Cable and Router
Your first step for Starlink Cable Repair is to disconnect the cable from the router and unplug your Starlink router.
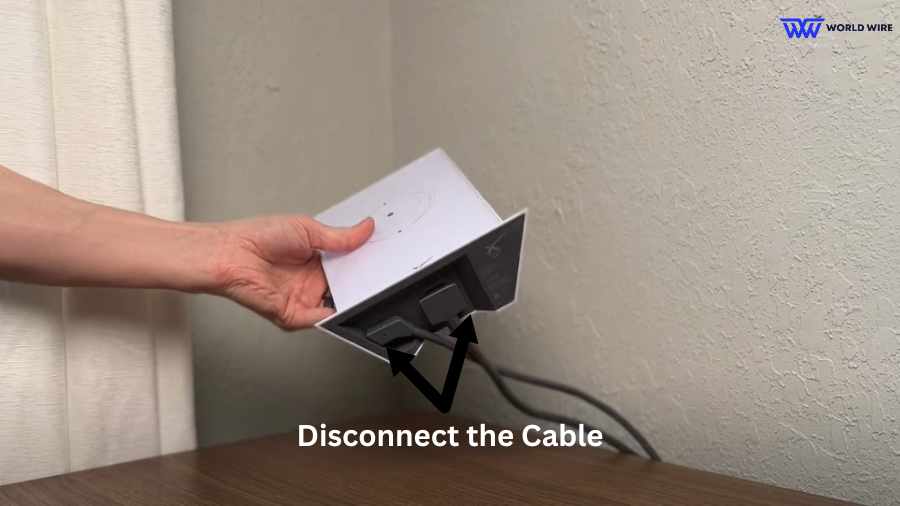
Then, check your cable and connector for any signs of damage or issues that may be causing the problem.
Once confirmed safe, you can proceed with handling the cable without concern for electrical shock or power running through it.
Check for Damage
You need to check the whole cable length to identify any visible signs of damage or wear. Cable problems can arise from various factors, including animal damage or external abrasion.
Watch out for areas where the cable may have been bent or compressed, as this can harm the internal wires even if the outer jacket remains fine.
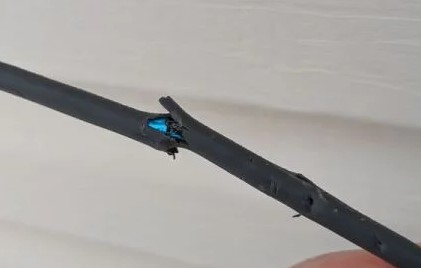
Also, check the ends of the cable for any wetness, harm, or rust. Make sure the plugs and inside pins are not broken or damaged.
Please note if the Starlink power cable is broken, you need to perform a Starlink Power Supply Replacement instead of repairing it.
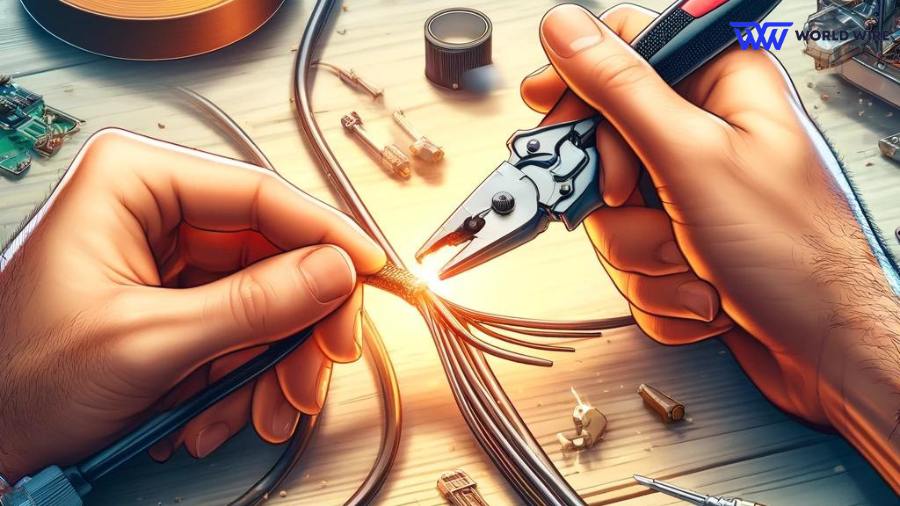
Remove the Damaged Portion
Trim away the damaged part of the cable using wire cutters.
Leave sufficient length to ensure you can reconnect the repaired ends later.
Avoid cutting too close to the visible damage, as it might extend further along the cable than initially apparent.
You can leave about an inch on both sides of the damaged section to ensure adequate margins for repair.
Strip Out the Covering of the Wire
Using a wire-stripper tool, remove the cable’s outer jacket, exposing about 1 inch (2.5 cm) of the cable on both ends of the cut.
Inside, you’ll find four pairs of twisted wires, enclosed by a light blue foil and plastic shielding layer, along with a bare metal grounding wire running outside the shielding.
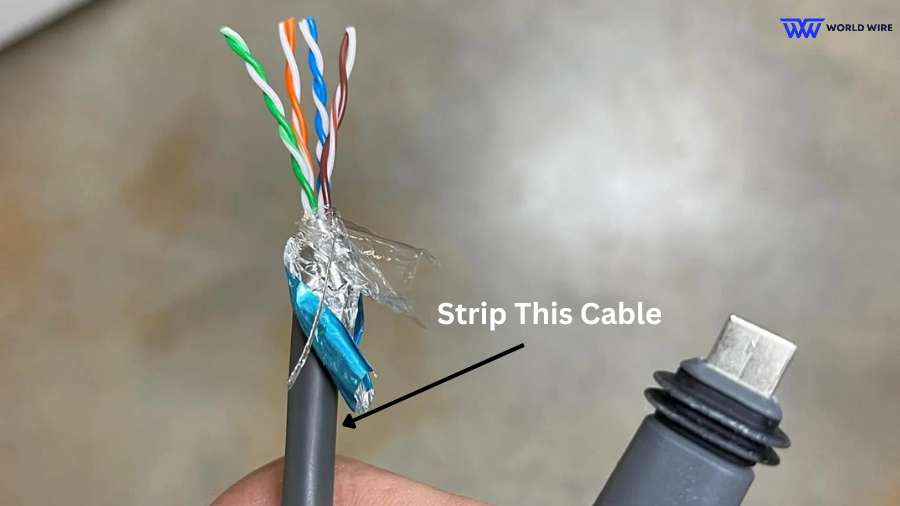
Take care not to damage the internal cables as you remove the plastic outer cover.
Peel back and tear off the layer of shielding foil and plastic encasing the twisted wire pairs.
This can be done by hand or with a tool, ensuring the twisted pairs and grounding wire remain intact while removing the shielding.
Time to Straighten the Wire
First, untwist the four pairs of wires inside the cable carefully. Take your time to straighten them out as much as possible, as this process may require some patience.
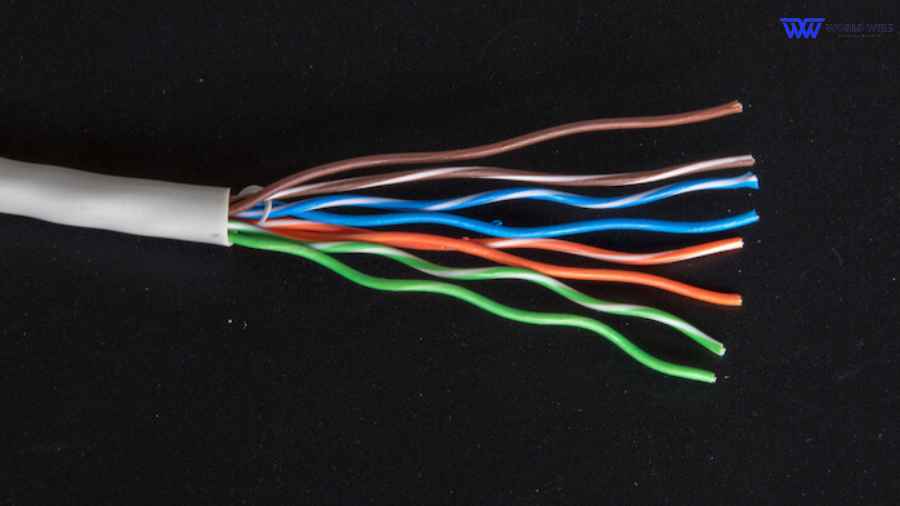
Ensure that the wires are adequately straightened for easier handling.
Next, use a wire stripper to remove a quarter-inch of insulation from each of the untwisted wires.
Be thorough and repeat this process for all eight paired wires inside the cable. Leave the ground wire aside for now, focusing on stripping the insulation from the other wires.
Arrange the Wires
You need to organize the stripped wires in the correct order before inserting them into the Cat 6 plug end.
Follow the T568B wiring scheme, which arranges the wires in a specific order for proper connection. Remember to keep the ground wire separate from the other eight wi
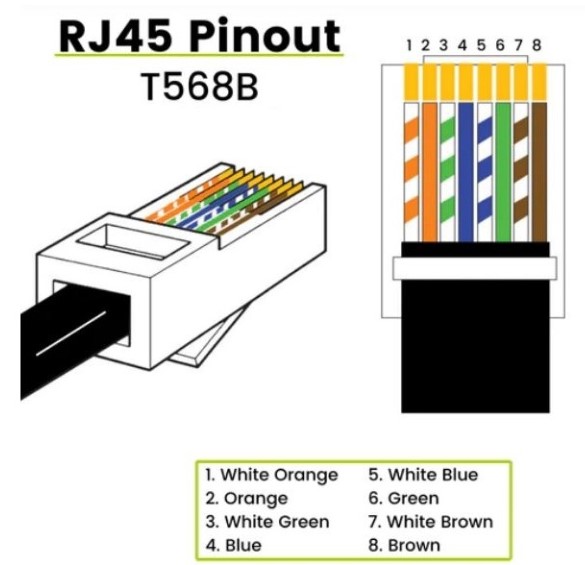
The correct order, from left to right, is.
- White-Orange
- Orange
- White-Green
- Blue
- White-Blue
- Green
- White-Brown
- Brown
Insert the Wires
Now, you’ll attach an 8P8C modular connector, which is the clear plastic plug found at the end of the cable, resembling other Ethernet or phone cables (also known as RJ-45).
Inside this plug, there are eight holes for the wires.
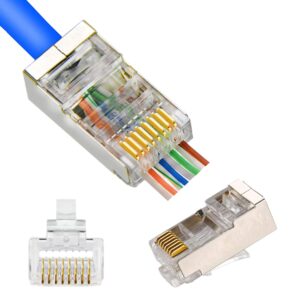
Following the T568B wiring pattern mentioned earlier, arrange the wires from left to right in the same order, with the plug’s retainer clip facing downward. Carefully feed the wire in order.
Secure the Wire
Use the crimping tool to firmly attach the plug end to the wires, ensuring a secure and permanent connection.
Repeat on the Other Half of the Cable
Next, if you’ve taken out a broken part from the middle of your Starlink cable, you’ll have to do the same for the other side of the cable.

Follow steps 2 to 10 again, arranging the wires in the same order as the other side when putting them into the plug end.
Connect the Ends
Connect the two ends of the cable using a Cat 6 coupler. This device provides two sockets for plugging the cable ends into each other. Insert each end of the cable into the coupler to reconnect them securely.
Next, you’re nearly finished! The Starlink system powers the dish using the same cable that transfers your internet data. Therefore, it includes an extra ground wire that must be connected.
Ideally, the grounding wire should be long enough to allow for easy connection of the two ends. However, when the coupler was installed, this was not the case due to the cable damage.
The solution involved stripping part of the ground wire from the damaged cable section, confirming the wire was intact, trimming it to the needed length, and connecting the two loose ends with wire nuts.
Ensure to use a Waterproof Enclosure
If you’re planning to keep the repaired cable outdoors, it’s important to protect it from moisture. You may not need this if the cable will be indoors.
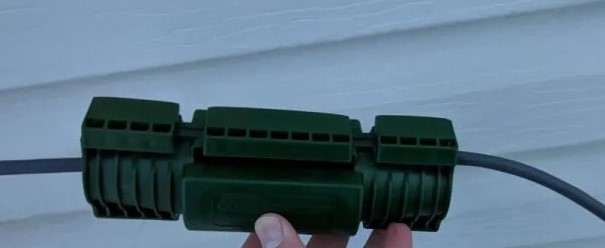
To safeguard Starlink Cable Repair from the elements, you can use a weatherproof extension cord plug cover.
This cover is designed to fit over the joining plugs of two extension cords, providing enough space for the coupler and wire nuts while sealing tightly to keep rain and water out.
Check If the Repair Work
Once it’s fixed, you can reconnect the cable to the router and plug in the power cable to test if your repairs were successful.
While it’s best to check the cable’s integrity before completing the Starlink Cable Repair, not everyone has the necessary testing equipment. If you followed the repair steps correctly, the Starlink buffering or not working issue should be resolved.
Do I Have to replace Starlink Cable after repair?
Yes, it would be best if you replace the cable after performing Starlink Cable Repair.
As Starlink Cable Repair can temporarily resolve the issue and keep you connected for a few weeks, it may not offer a permanent solution.
So, it’s advisable to replace the Starlink Cable Repair with a new one as soon as possible.
Although the repair can serve as a temporary fix while waiting for Starlink to provide new equipment, relying on it for an extended period may not be ideal.
Where Can I Get Starlink Cable Replacement?
Although the options for replacement cables may be limited, they are mostly available through aftermarket suppliers rather than directly from Starlink.
When seeking a replacement cable, it’s essential to consider compatibility with your specific Starlink dish version and data plan.
While online retailers often offer replacement cables, it’s advisable to check the Starlink official store first for availability.
FAQs
How Much Does Starlink Cable Replacement Cost?
CAT6 couplers can cost as little as $10 for a single unit. They can cost less if you buy in bulk.
Should You Repair Or Replace A Damaged Starlink Cable?
Well, repairing a damaged Starlink cable is better and more practical than replacing one if the damage is within a small area.
Can A Starlink Cable Be Replaced?
Starlink does not carry cables for every dish type or data plan. It’s important to verify the compatibility of any replacement cable to ensure it matches the specifications for either the Version 1 Starlink dish or the second-generation dish.
What Type of Cable Does Starlink Use?
Starlink cable is constructed with four pairs of CAT5e wires, totaling eight individual wires when deconstructed. These wires are twisted into pairs, ensuring a snug fit within the connector.
How can I safeguard my cable from rain?
You can use a weatherproof extension cord plug cover to keep it safe from rain and moisture.
Enter your email to stay updated with offers
If you can’t see the form above, click here to open the form.

Add Comment