


Do you want to know everything about Starlink Port Forwarding? If so, you have stumbled upon the right article.
Starlink port forwarding is a feature that lets users direct internet traffic to specific devices on their network.
It’s like telling the mail carrier exactly where to deliver a package to your home.
Customers might need Starlink Port Forwarding to run servers, use gaming consoles, or for certain types of software that require direct communication over the internet.
It helps these services work better and more securely.
In this article, I have shared everything related to Starlink Port forwarding, such as if port forwarding is possible with Starlink and, if yes, then how you do it.
So, without any further ado, let’s get started.
Does Starlink Have Port Forwarding?

Currently, Starlink doesn’t support port forwarding. However, Starlink port forwarding is still possible, which we will learn later in the article. For now, let’s discuss a few important things.
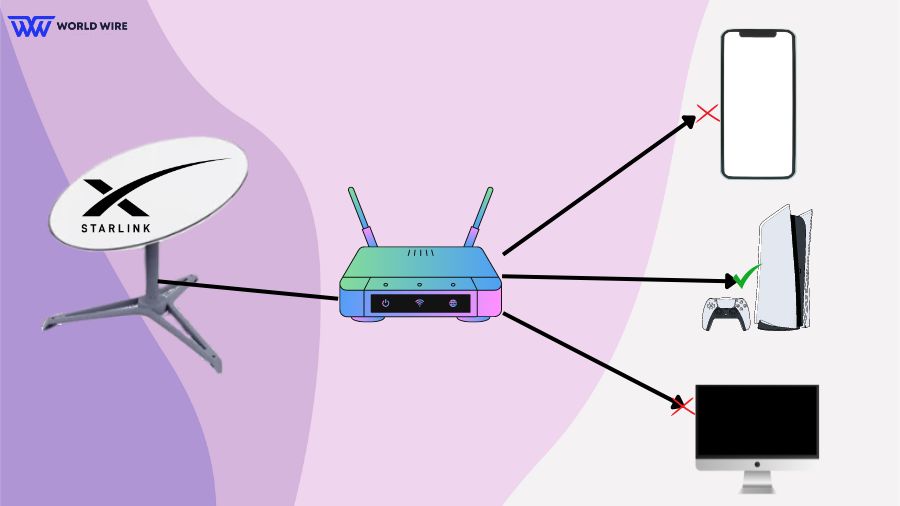
Port forwarding is a way to allow computers on the internet to connect to a specific computer or service within a private local network.
It works by setting up a rule in your router that directs traffic to a specific port to a specific device inside your network.
This is often used for running web servers, gaming servers, or other services that need access from outside your home or business network.
Since Starlink doesn’t support Port Forwarding, users can’t set up these types of direct connections using their Starlink internet service.
What is CGNAT and How Do I Bypass It?
Carrier Grade Network Address Translation (CGNAT) is a technology ISPs use to extend IPv4’s lifespan by allowing multiple subscribers to share a single IP address.
While cost-effective for ISPs, it complicates direct device access due to blocked inbound ports under Starlink’s default CGNAT policy.
In the case of Starlink, both CGNAT and Port forwarding go hand in hand. Starlink employs Carrier-Grade NAT (CGNAT) to manage IP address allocation by assigning multiple subscribers to a single public IP address.
This architecture complicates traditional port forwarding, as incoming packets cannot be routed to specific internal devices without unique external IP addresses.
To bypass Starlink CGNAT limitations, customers can employ a VPN service.
A VPN can help bypass the limitations of Starlink’s CGNAT by establishing a secure tunnel from your device to a VPN server with a unique public IP address.
This makes your internet traffic appear to be coming from the VPN server instead of through Starlink’s shared IP.
Additionally, some VPN services offer port forwarding, which allows external connections to reach your device via specific ports on the VPN server.
Apart from VPN, if your mobile network isn’t under CGNAT, you can connect your mobile phone to your Starlink router and use it as a hotspot.
Challenges of Starlink Port Forwarding

Port forwarding enables remote access to services on a local network. It typically involves configuring a router to direct internet traffic to specific devices. However, implementing port forwarding on Starlink presents unique challenges.
Port forwarding is essential for remote access to services hosted on a local network, where a router is configured to direct incoming internet traffic to specific devices. However, implementing this on Starlink involves several unique challenges:
Security Risks
Opening ports through port forwarding can make your network visible and accessible from the Internet, increasing vulnerability.
Hackers actively scan for open ports to exploit, potentially gaining unauthorized access to your systems and sensitive data. This risk necessitates robust security measures, like firewalls and secure passwords, to protect exposed services.
Starlink-specific Configuration Issues
Starlink’s use of Carrier-Grade NAT means users do not have unique public IP addresses. Instead, many users share a single IP address.
This setup makes traditional port forwarding nearly impossible. Incoming traffic to a shared IP cannot be routed to a specific user’s device without additional configuration, requiring alternative methods or ISP intervention for direct external access.
Remote Access Complexity
Starlink typically assigns dynamic IP addresses that can change over time. This variability makes it difficult to maintain stable remote access because the IP changes require frequent updates to the port forwarding configuration.
Users must continuously monitor and update their settings to ensure remote access remains operational.
How To Perform Starlink Port Forwarding
Although Starlink does not support port forwarding, customers can still port forward by connecting a third-party supported router.
Here are the steps to Starlink Port Forwarding.
Identify your Starlink Terminal
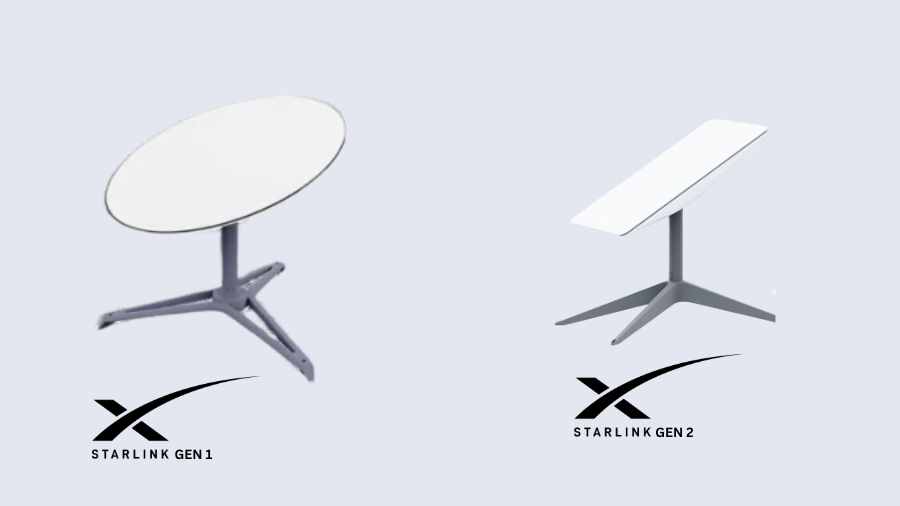
Please note that Starlink offers two generations of hardware for home users: the Gen-1 Terminal (Round Dish) and the Gen-2 Terminal (Rectangular Dish).
The primary difference between these versions is the presence or absence of an Ethernet Jack. The Gen-1 terminal has an Ethernet jack, whereas Gen-2 does not.
Check Router Compatibility
Ensure your third-party router supports port forwarding and can handle dynamic IP addresses via DHCP.
Connect the Third Party Router
Here are the steps to connect a third-party router to Gen-1 and Gen-2 terminals.
Follow the steps if You have a Gen-1 Starlink Terminal
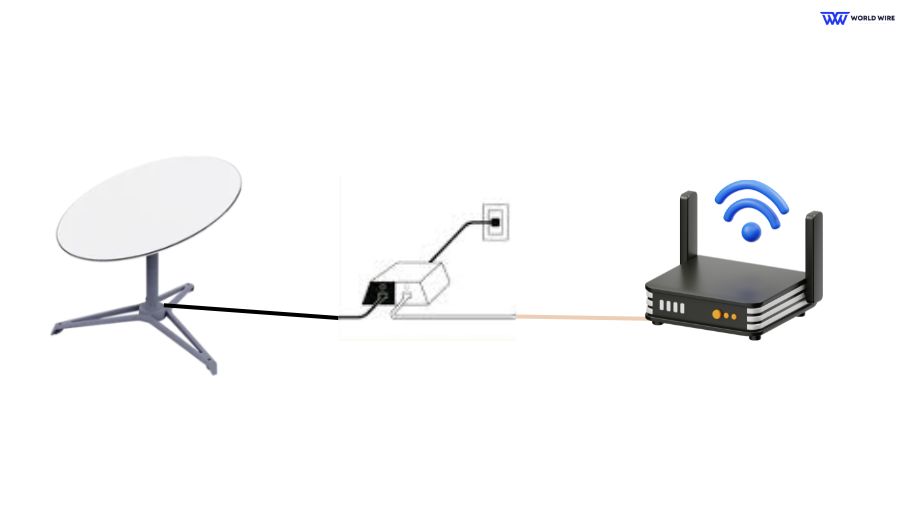
The original Gen-1 Terminal features a round dish equipped with an Ethernet Jack. Since the standard Starlink Router does not support Bypass Mode, it must be disconnected if you want the third-party router to serve as the primary router. Configure your network as follows:
- Disconnect the Starlink Router by removing the cable connected to the power supply.
- Connect the Starlink PoE (Power over Ethernet) Adapter to the WAN port of the third-party router.
Follow the steps if You have a Gen-2 Starlink Terminal
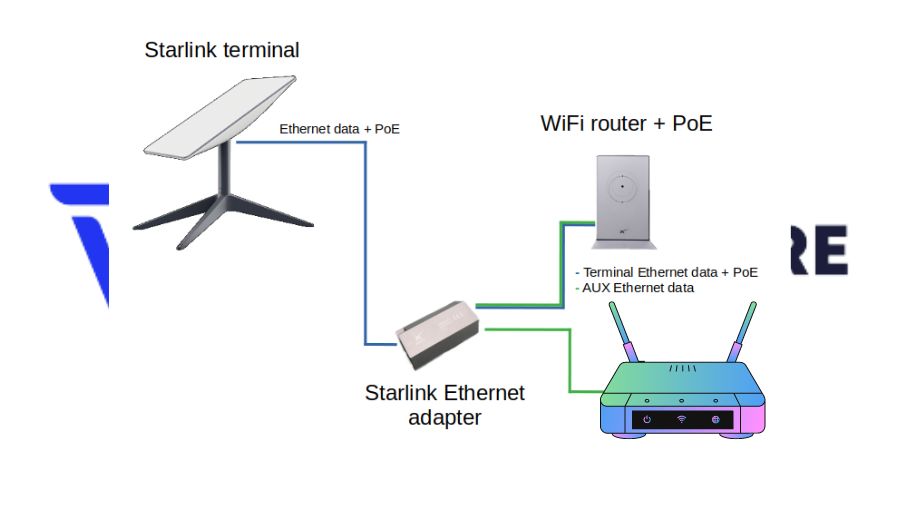
The Gen-2 Terminal, characterized by its rectangular dish, does not include a PoE adapter. For this version, an Ethernet Adapter must be purchased from Starlink for router connection.
After linking the Starlink Terminal to the Starlink Router:-
- Attach the third-party router’s WAN Port to the Starlink Ethernet Adapter.
- To designate the third-party router as the main network router, activate “Bypass Mode” on the Starlink Gen-2 via the Starlink App. If you see Starlink No Active Account contact customer care to resolve the issue.
Activating Bypass Mode will turn off all wireless features on the Starlink Terminal, and a factory reset is needed to revert to the original router mode.
Note: “Bypass Mode” specifically allows third-party routers to handle network traffic and is not a feature for enabling port forwarding on the Starlink router itself.
Set Up Port Forwarding on Your Router
Once your third-party router is connected, follow the steps below.
- Log into your router’s administration interface. This is usually done through a web browser using an IP address like 192.168.1.1 or 192.168.0.1.
- Look in the router settings for the port forwarding section. It could be under tabs like “Advanced,” “Port Forwarding,” “NAT,” or “Applications.”
- Enter the specific ports you need to forward and specify the local IP address of the device that requires external access. This device could be a server, a gaming console, or a security camera.
- Save the settings and test the configuration to ensure the ports are forwarded correctly. You can use online tools to check if the ports are open.
Verify and Test Connection
Check the WAN IP address in your router’s admin panel to confirm it receives an IP from Starlink.
In addition, tools like port checkers should be used to ensure that the intended ports are open and to direct traffic to the correct internal IP address.
Alternatives to Starlink Port Forwarding
While port forwarding is a common method for remote device access over the Internet, some users may seek alternatives for enhanced security due to limitations with Starlink’s use of CGNAT. Below, you will find a brief examination of potential options.
Virtual Private Network (VPN)
A VPN allows the extension of a private network across the public internet, enabling you to send and receive data as if your devices were directly connected to the private network. Establishing a VPN server bypasses the need for port forwarding by directing all traffic through a secure tunnel.
- Step 1: Obtain services from a reputable VPN provider that supports port forwarding.
- Step 2: Install the VPN software on the relevant device.
- Step 3: Configure the VPN to permit port forwarding if necessary.
Mesh System
You might consider setting up a mesh network system to improve local network coverage rather than enable remote access.
These systems provide extensive Wi-Fi coverage and usually have advanced router features that simplify network management.
Unlike traditional routers that broadcast Wi-Fi from a single point, mesh systems use multiple access points, or ‘nodes,’ to create a seamless and robust Wi-Fi network.
Each node communicates with the others, creating a cohesive network covering every corner of your space.
Installation is straightforward, and many mesh systems offer user-friendly apps that guide you through the setup and allow you to manage your network effortlessly.
Adopting a mesh network ensures a stable and consistent internet experience.
For users aiming to bypass limitations like CGNAT, replacing port forwarding with a service such as a VPN can be an effective method.
Additionally, incorporating an advanced router or mesh system may enhance local network management without directly affecting remote access capabilities.
Troubleshoot Starlink Port Forwarding Issues
When port forwarding with Starlink, you may encounter various issues that can interrupt your internet traffic. Understanding common problems and how to troubleshoot them effectively ensures reliability and security within your network setup.
Incorrect Router Settings
A primary cause of port forwarding issues stems from inaccurate router settings. You should:
- Verify that IP addresses are correctly assigned to devices.
- Match ports with the services they are intended for.
- Inspect firewall settings to ensure they’re not inadvertently blocking necessary traffic.
- Given Starlink’s dynamic IP address changes, consider using dynamic DNS services to maintain consistent access.
Firmware and Updates
Outdated firmware can lead to connectivity problems. You should routinely check for and install any available firmware updates for your router.
Security and Configuration
Ensure correct router settings by verifying IP assignments and matching ports to services.
Use network monitoring tools to analyze incoming and outgoing traffic patterns and keep logs of router traffic to spot any unusual activity or potential security breaches.
Factory Reset
A factory reset can be a final resort when other solutions fail. Reset the Starlink router to its original state and remove all custom configurations.
Frequently Asked Questions
Does Starlink use IPv4 or IPv6?
Starlink operates on an IPv6 native network in beta, providing all users with a public IPv6 /56 prefix, ensuring expansive address space and simplified connectivity.
For IPv4, Starlink employs a “default” policy using CGNAT, which might limit direct connections, and a “public” policy offering a public IP address to certain customers, facilitating broader accessibility.
How can I secure my Starlink port forwarding setup?
To secure your Starlink port forwarding setup, only open the necessary ports and monitor them regularly. Use strong, unique passwords for all devices and services accessible through the forwarded ports.
Additionally, consider employing network firewalls and regularly updating your devices to protect against vulnerabilities.
How do I know if I need port forwarding with my Starlink connection?
You might need port forwarding with your Starlink connection if you’re hosting services requiring direct internet access to your local network, such as game servers, web servers, or certain remote access tools.
Port forwarding might be required if your service or application isn’t functioning as expected due to connectivity issues.
Is it necessary to use a third-party router to forward the port with Starlink?
While the standard Starlink router doesn’t support port forwarding due to its use of CGNAT, using a third-party router can provide a workaround. This approach is necessary for users who need direct connections for specific services or applications.
What are the security implications of port forwarding on Starlink?
Port forwarding on Starlink, like with any network, opens specific ports to the Internet, which can increase security risks. If not properly secured, it can expose your network to unauthorized access.
To mitigate risks, necessary and only open ports, use strong passwords, keep your systems updated, and consider additional security measures like firewalls and VPNs.
Enter your email to stay updated with offers
If you can’t see the form above, click here to open the form.

Add Comment