


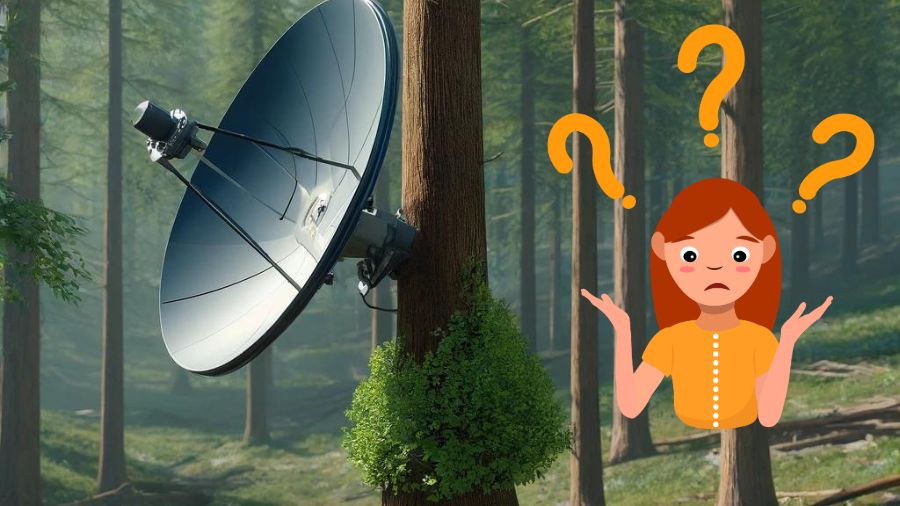
Installing Starlink Tree Mount is an excellent way to get high-speed and reliable internet service in areas where traditional cable or fiber internet is unavailable.
Starlink is a satellite internet service that provides fast and reliable internet access to users in remote and rural areas.
The service is powered by a network of low-Earth orbit satellites that provide high-speed internet access to users on the ground.
I’ve just installed a Starlink Tree Mount, which wasn’t without its challenges.
Finding the right tree was the first hurdle, as it needed to be sturdy and positioned away from obstructions to catch a strong signal.
Securing the mount base to the tree required some effort to ensure it was stable and perfectly level, which was crucial for optimal dish performance.
Aligning the dish for the best signal was tricky, as it involved fine-tuning the position multiple times.
Despite these challenges, I managed to set it all up, and I’m eager to see the improvements in our internet connection.
In this article, I have shared the steps for installing a Starlink Tree Mount. I hope it helps.
So, without any further ado, let’s get started.
What Is a Starlink Tree Mount?
A Starlink tree mount is a pole or mast attached to a tree that provides a stable and elevated platform for the dish.
The Starlink dish requires a clear view of the sky to function properly, and a tree mount can be a great option if you don’t have a clear view from the ground.
It can also be a good option if you’re looking for a more discreet installation, as the dish can be hidden in the tree canopy.
Choosing the tallest and sturdiest tree possible is important when considering a tree mount.
You will also need to ensure that the tree is healthy and strong enough to support the weight of the mast and dish.
It’s important to note that installing a Starlink tree mount requires climbing the tree, which can be dangerous if not done properly.
You should use a ladder or safety straps when climbing the tree and have experience with tree climbing before attempting to install a tree mount.
Can Starlink Be Mounted on a Tree?
Yes, Starlink can be mounted on a tree.
Mounting it on a tree can provide the necessary elevation for optimal signal reception. However, it is important to note that mounting the dish on a tree requires careful consideration and planning to ensure safety and stability.
Before mounting the dish on a tree, it is important to identify the tallest and sturdiest tree with a clear view of the sky.
You should also ensure the tree is not near power lines or other potential hazards.
Once you have identified the tree, you can climb it using a ladder or safety straps and trim any branches at the top to provide a stable point for the mast.
You can use a tree mount kit designed for DIY installation to mount the dish on the tree.
These kits typically include a mast, brackets, and hardware for attaching the dish to the tree.
Starlink Tree Mount Installation – Step-by-Step Guide
If you’re looking for a way to install your Starlink dish without mounting it on your roof, a tree mount may be your solution.
With the right tools and knowledge, you can easily install a Starlink dish on a tree in your yard. Here’s how:
Choose the Right Tree

The first step in installing a Starlink tree mount is to choose the right tree.
You’ll want to choose a tall tree to get a clear view of the sky that is sturdy enough to support the weight of the dish. Avoid branches and leaves blocking the dish.
Look for a tree at least 20 feet tall with a trunk diameter of at least 6 inches.
Setup Tree Mount Kit
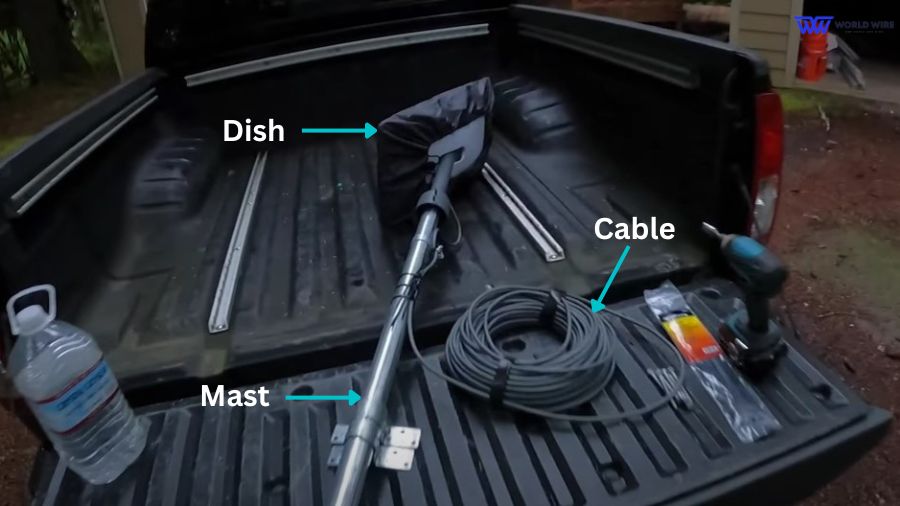
Now that you have chosen a tree to install the Starlink Tree Mount on, you must attach the Mast, Dish, and power cable before climbing the tree.
Make sure everything is connected properly and tightly.
Climb the Tree
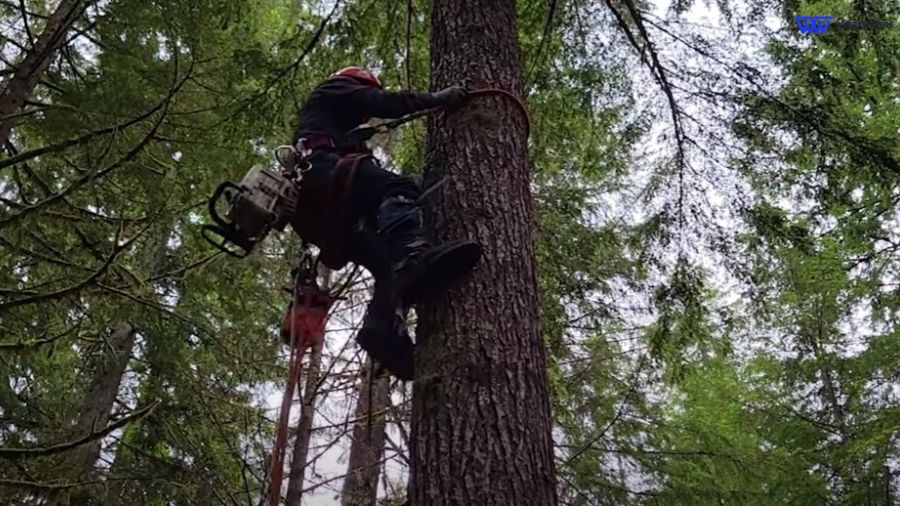
Once you’ve chosen your tree, it’s time to climb up and install the mount. You’ll need a ladder or safety straps to climb the tree safely. Make sure you have someone to help you and that you’re wearing appropriate safety gear.
Install the Starlink Tree Mount
The next step is to install the Starlink Tree Mount on the tree.
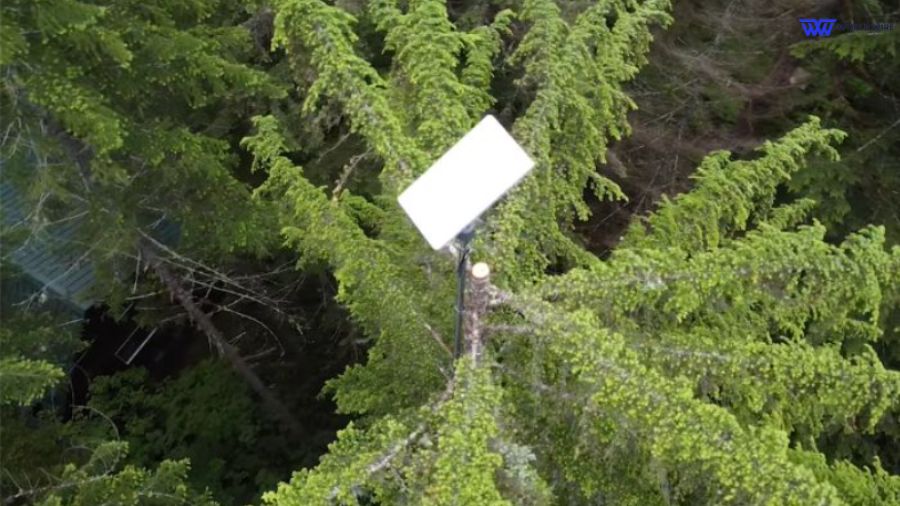
Secure the tree mount to the tree using straps or clamps that come with the mount.
Adjust the dish to point in the direction suggested by your Starlink setup to get the best signal. This might require adjusting the angle and rotation.
Note: Any obstacles, such as branches and leaves, should not cover the dish.
Connect the Cable to the Router
Once the Starlink tree mount is installed, it’s time to run the cable from the dish to your home.
You’ll need to run the cable down the tree along the ground to your home.
Use cable ties to secure the cable to the tree and to keep it out of the way.
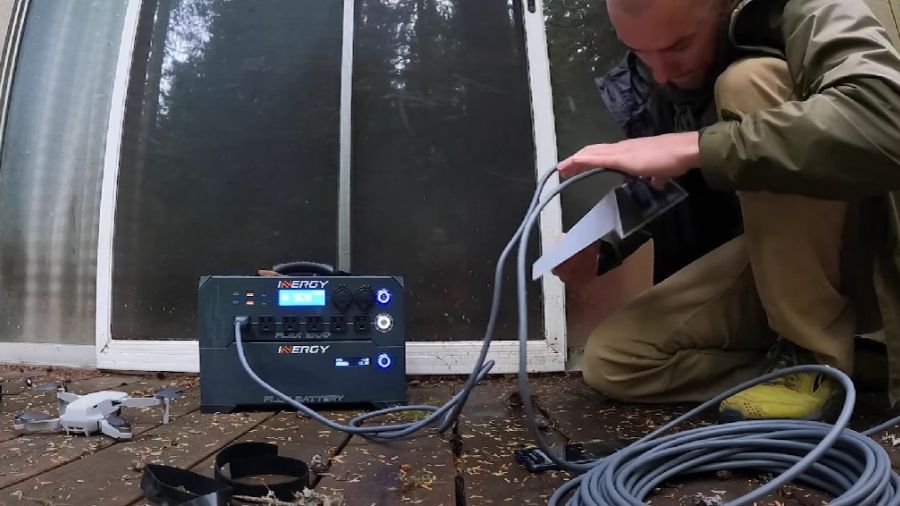
Once the cable is inside your home, connect it to the Starlink router.
Check the Connection

Now that everything is ready and your router is plugged in, you can connect it to the Starlink App.
Once the status on the Starlink App shows online, you can check your internet connection by searching the web, watching videos, or playing games.
If you see a no-active-account issue, try some troubleshooting techniques in the Fix Starlink No Active Account guide.
Also, if you are not getting a good signal, the app will guide you through the process and help you find the best angle for the dish.
Ensure the dish is in a clear view of the sky and pointing in the right direction.
Factors to Consider for Starlink Tree Mount
If you’re considering mounting your Starlink dish on a tree, there are several factors to remember to ensure a successful installation.
Here are some important things to consider:
Tree Selection
The tree itself is the first factor to consider when mounting your Starlink dish on a tree.
Choosing a tall tree is important to provide a clear line of sight to the sky. The tree should also be sturdy enough to support the weight of the dish and the mounting equipment.
Additionally, it’s important to choose a tree that is easily accessible so that you can safely climb the tree to install the dish.
Mounting Equipment
Once you’ve selected a suitable tree, the next factor to consider is the mounting equipment.
Several options for mounting your Starlink dish on a tree are available, including DIY kits and aftermarket mounts.
It’s important to choose a mounting option compatible with your specific Starlink dish and designed to attach securely to a tree.
Safety Precautions
Finally, when installing your Starlink dish on a tree, it’s important to take appropriate safety precautions.
This includes climbing the tree using a ladder or safety straps, trimming branches that may obstruct the dish’s line of sight, and ensuring the mounting equipment is securely attached.
Grounding the mounting equipment is also important to prevent damage from lightning strikes.
Maintenance and Troubleshooting Starlink Tree Mount
Once you have successfully installed your Starlink Tree Mount, regular maintenance is important to keep the dish functioning properly.
Here are some tips for maintaining and troubleshooting your Starlink Tree Mount:
Check the Mount
Regularly inspect it to ensure it is securely fastened to the tree. If you notice any loose bolts or screws, tighten them immediately.
If the mount appears to be damaged, contact Starlink support for assistance.
Clean the Dish
Dirt, debris, and bird droppings can accumulate on the dish over time, affecting the signal quality. To clean the dish, use a soft, damp cloth to wipe away any dirt or debris.
Avoid harsh chemicals or abrasive materials, which can scratch the dish’s surface.
Check the Cables
Inspect the cables connecting the dish to the modem to ensure they are not damaged or frayed. If you notice any damage, replace the cables immediately.
Check the Modem
If you are experiencing connectivity issues, check the modem to ensure it functions properly.
If the modem appears malfunctioning, update the router software via the app, reset it to default settings, or contact Starlink support for assistance.
Check for Obstructions
If you notice a decrease in signal quality, check for obstructions blocking the dish’s line of sight to the satellite.
Common obstructions include trees, buildings, and other structures. If you notice any obstructions, try moving the dish to a different location or adjusting the angle of the mount.
Alternative to Starlink Tree Mount
If you cannot mount the Starlink dish on a tree, other options are available. Here are some alternatives to the Starlink tree mount:
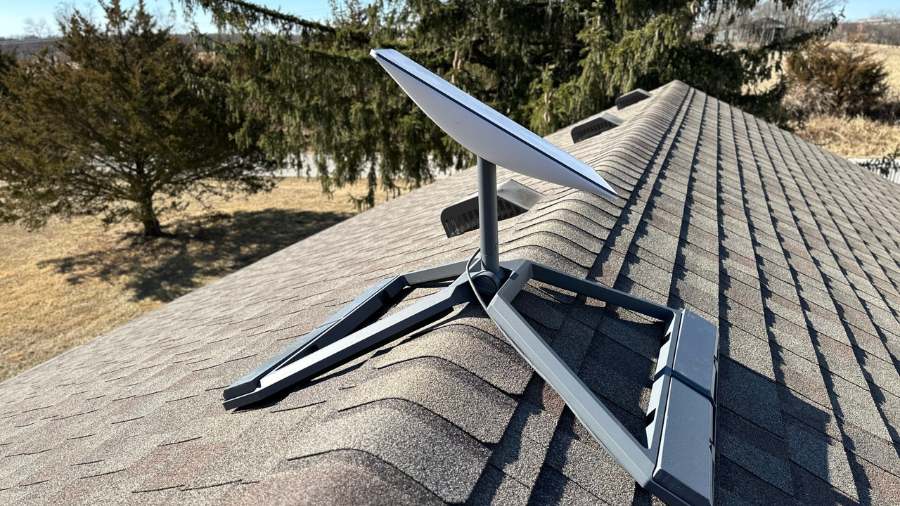
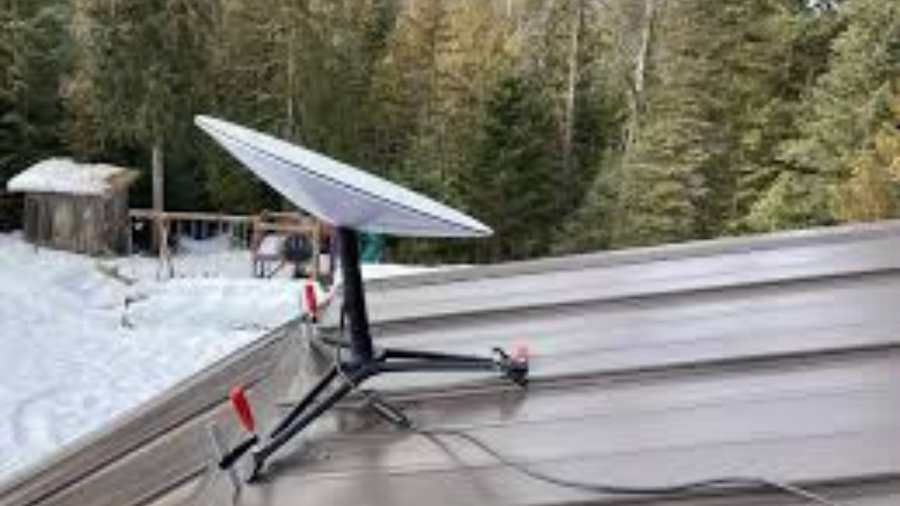
Flat Roof Mount
If you have a flat roof, you can mount the Starlink dish on it. The installation process is similar to that of the tree mount.
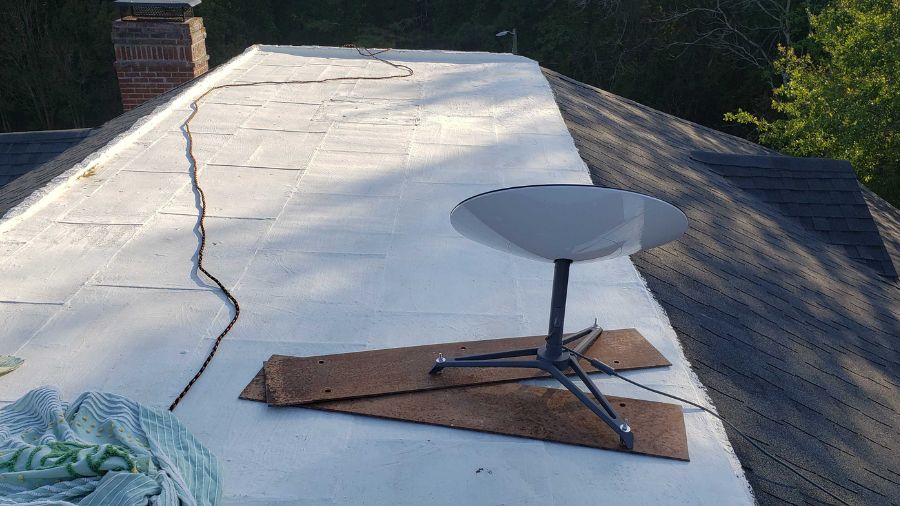
You must identify the location with a clear line of sight to the sky and mount the dish using a J-mount. Ensure the roof is strong enough to support the dish’s weight and secure the mounting surface.
Slanted Roof Mount
You can still mount the Starlink dish using a J-mount if you have a slanted roof.
However, the installation process is slightly different. You need to ensure the mounting surface is level and the dish is pointed towards the sky.
If you’re not comfortable climbing on the roof, it’s recommended that you hire a professional.
RV Mount
If you’re on the move and need to use Starlink on your RV, you can mount the dish on your RV’s roof.
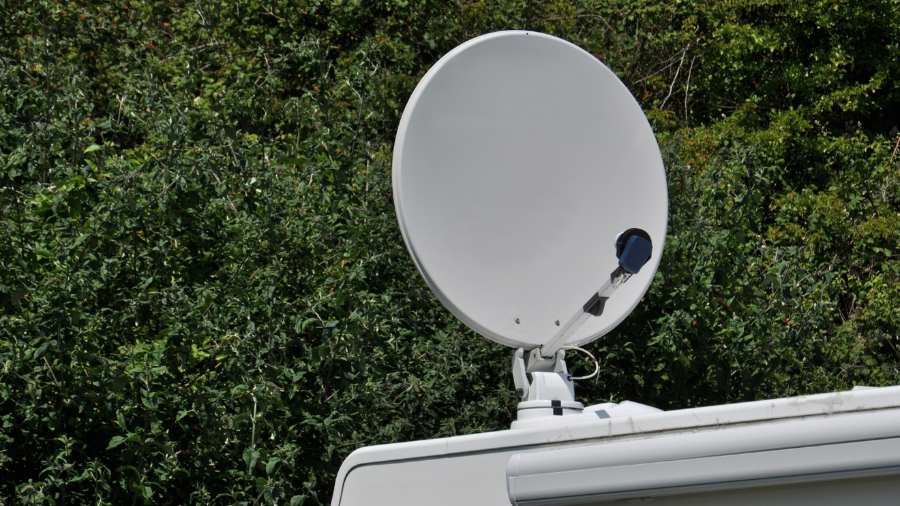
Specific mounts are available for RVs designed to withstand the vibrations and movements of the vehicle.
You must ensure the mounting surface is secure and the dish is pointed towards the sky.
Temporary Mount
You can use a temporary mount if you’re not ready to commit to a permanent installation.
Various mounts can be attached to a pole or a tripod. This option is ideal if you’re renting a property or unsure about the best location for the dish.
How to Contact Starlink Tree Mount Service
If you have trouble installing your Starlink dish on a tree, contact the Starlink Tree Mount Service for assistance.
To contact the Starlink Tree Mount Service, visit the Starlink website and fill out the contact form.
You can also call or text the Starlink customer support team for assistance at 360-520-1945.
The customer support team is available 24/7 to help you with any issues with your Starlink dish installation.
Frequently Asked Questions
What is the best mount type for installing Starlink in a wooded area?
A pole mount or a tripod with adjustable legs is recommended in wooded areas to elevate the Starlink dish above tree branches and ensure an unobstructed view of the sky.
Can I install Starlink if I have tall trees surrounding my property?
Yes, you can still install Starlink in areas with tall trees by using a pole mount or tripod to raise the dish above the tree line, providing a clear line of sight for optimal performance.
What should I do if I need a temporary installation of Starlink in a tree-dense area?
For temporary installations in tree-dense areas, consider using a portable pole mount or tripod that can be easily positioned to avoid tree obstructions and achieve a clear view of the sky for the Starlink dish.
Are any specific tools or accessories recommended for installing Starlink using a tree mount?
Recommended tools and accessories for installing Starlink with a tree mount include a sturdy ladder, cable ties or straps for securing the dish to the tree or pole, and a compass or smartphone app to ensure proper alignment.
How do I maintain my Starlink mount and dish in a wooded area?
To maintain your Starlink mount and dish in a wooded area, regularly check for debris accumulation or tree growth obstructing the dish’s view, ensure the mount is securely anchored, and periodically clean the dish to optimize signal reception.
Enter your email to stay updated with offers
If you can’t see the form above, click here to open the form.

Add Comment