


Do you want to know how to install a Starlink Tripod Mount? If so, you have stumbled upon the right article.
I recently decided to install a Starlink Tower mount to improve my satellite internet connection. The process began with choosing the perfect spot on my property that had clear visibility of the sky, which is crucial for a strong signal.
After unboxing the Starlink kit, I carefully read through the installation guide to familiarize myself with the steps and tools needed.
Mounting the dish onto the tower was straightforward, thanks to the detailed instructions.
I ensured everything was securely tightened and correctly aligned according to the coordinates provided by the Starlink app.
Finally, after connecting the cables and powering up the system, I was thrilled to see my internet speeds soar, all thanks to a successful installation of the Starlink Tower mount.
In this article, I have shared a step-by-step guide for installing the Starlink Tripod Mount. I hope it helps.
So, without any further ado, let’s get started.
Does Starlink Have A Tripod Mount
So, yes, Starlink does offer tripod mounts that are compatible with both 1st—and 2nd-generation Starlink dishes. They come with all the necessary parts for installation.
However, if you are looking for a long-term mounting solution, you must use a robust tripod mount with a height of 3 cm and a pole width of 2.5 inches to achieve a better elevation, especially on the ground.
What is included in the Starlink Tripod Mount kit?
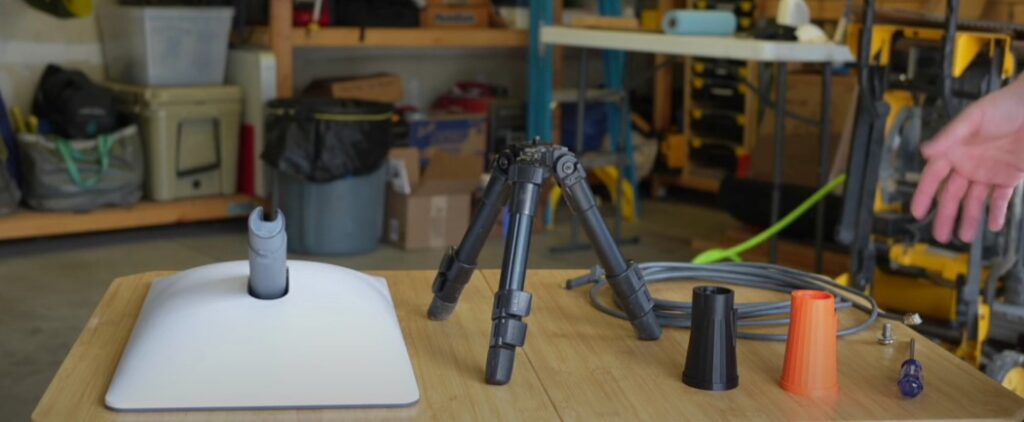
As mentioned in the above section, the Tripod mount comes with the necessary mounting items. We will examine these before we discuss the installation steps.
- Tripod Base: A sturdy, tripod-shaped base that supports the Starlink dish and allows for stable placement on various surfaces.
- Pole: A pole attached to the tripod base, designed to hold the Starlink dish at an optimal height for signal reception.
- Mounting Brackets: Brackets and hardware are necessary to attach the Starlink dish to the pole securely.
- Additional Hardware: Screws, bolts, and other fastening components required for assembly and installation.
- User Manual: Instructions and guidelines for setting up and installing the tripod mount with the Starlink dish.
Starlink Tripod Mount Installation – Step By Step Guide
Now that you have the kit let’s jump on the installation process. Please note that the installation steps are discussed for ground level; if you are looking for the roof, you can check the next section.
Also, before you start installation, be prepared with a base to place your tripod. Here’s all you need to do:
Choosing the Right Spot
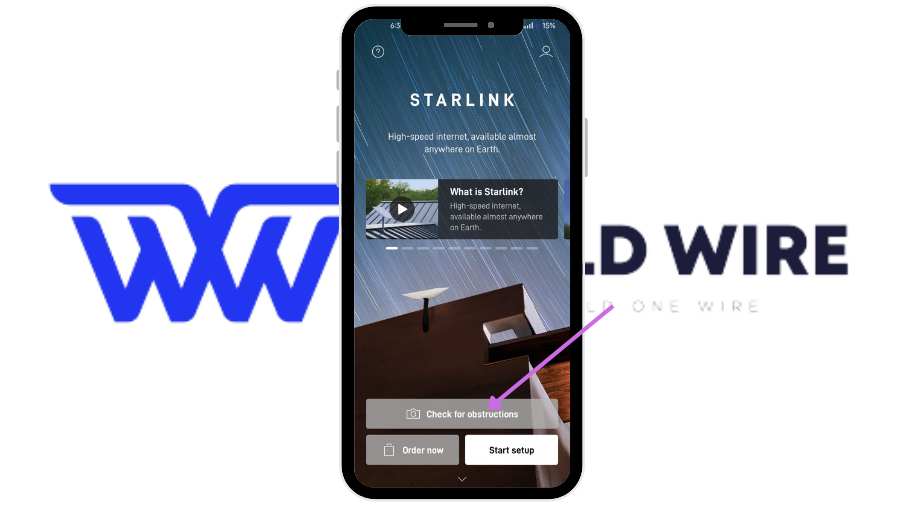
Start by finding a clear area where the dish can have an unobstructed view of the sky. You can check for obstructions using the Starlink app.
You can point your camera in the open sky and let the app check for obstruction.
Initial Testing
Place the dish using the stock mount and allow it to collect obstruction data for 12 to 24 hours. This will help determine the optimal position for the dish by identifying any potential obstructions.
After the testing period, check for red dots on the Starlink app that indicate obstructions. You can check out our complete guide on Starlink obstruction to learn everything about the process.
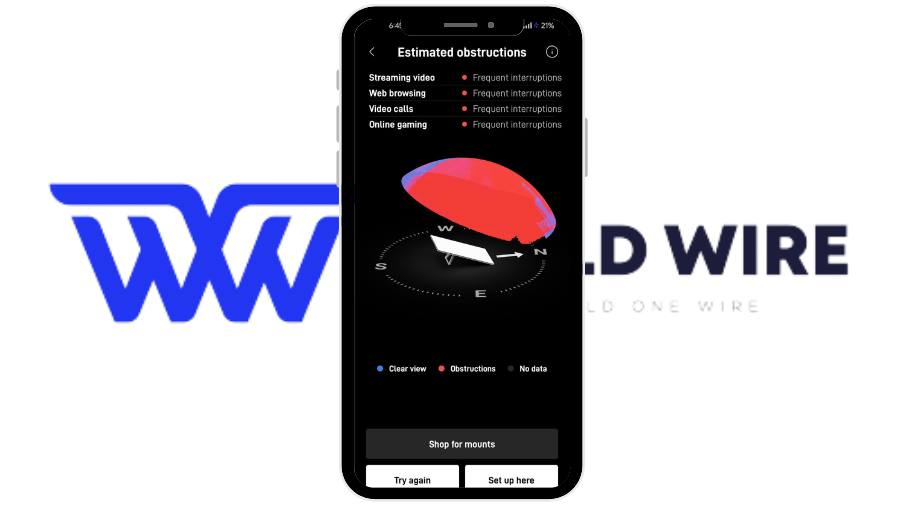
If any are visible, consider moving the dish to a different location.
If there are only a few, you might need to adjust the dish’s position upwards or sideways to clear these blockages.
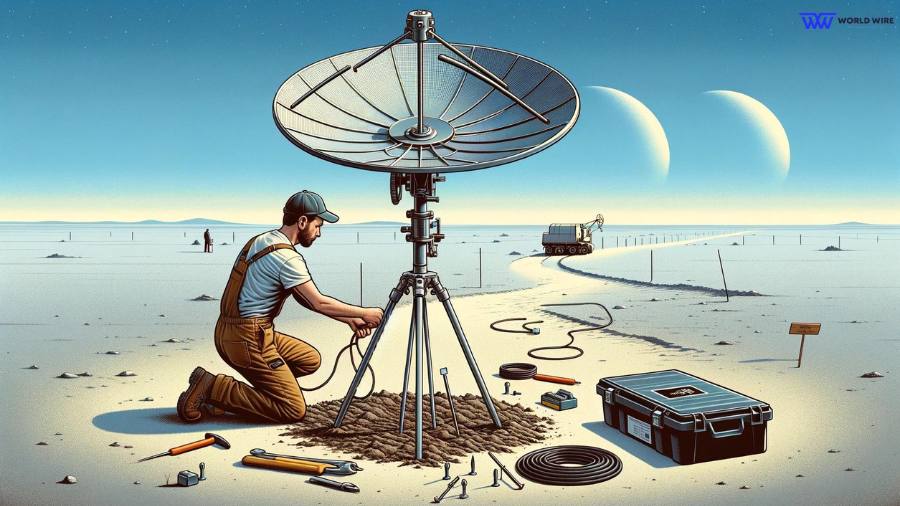
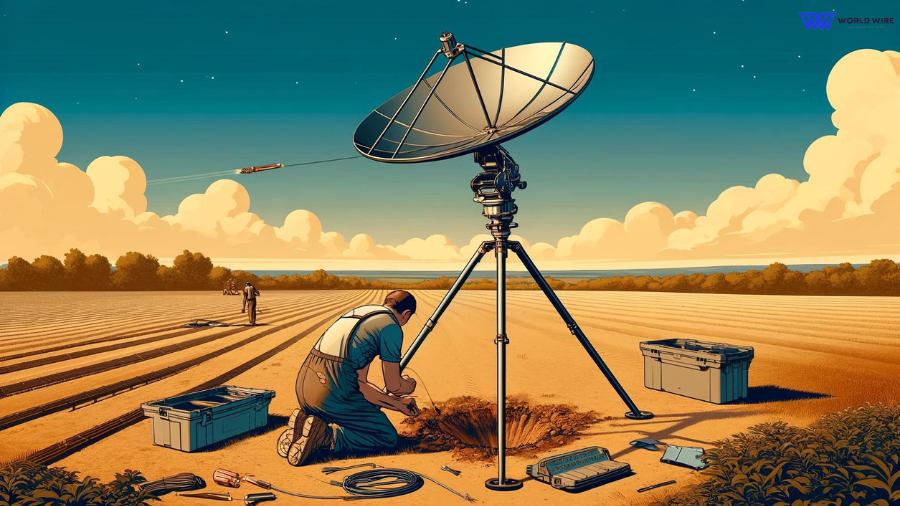
Securing the Tripod
Once the best location is confirmed, firmly secure the tripod to the ground. Using 10-inch nails can provide better stability, especially in windy conditions.
Installing the Dish
Attach the Starlink adapter to the tripod pole, reconnect the dish to the power supply, and allow it to search for a signal.
By following these steps, you’ll ensure your Starlink dish is optimally positioned for the best connectivity. Once everything is set up and there are no obstructions, your installation is complete.
Starlink Tripod Mount Installation Roof
You can follow these steps if you are looking to install your tripod for a roof level. Here are the quick steps:
- Place the tripod in the desired location with a clear signal. As you are installing it on the roof, you won’t have to check for obstructions. However, if you are installing Starlink in a wooded area, you need to check for obstructions.
- Mark the positions of the tripod holes on the roof and kindly drill it.
- Spray sealant into the drilled holes to prevent water infiltration and use sealant patches.
- Align the tripod holes and secure them with the drilling bolts with washers through the tripod holes into the roof.
- Apply sealant or caulk around the tripod stand for extra protection.
- Insert the Starlink adapter into the tripod pole and then reconnect the dish to power and search for a signal.
So, wasn’t it simple? Well, please ensure that the steps discussed above are suitable only for flat roofs.
Alternatives to Starlink Tripod Mount
When looking for more permanent solutions for mounting your Starlink dish, there are several reliable alternatives to consider. Here are a few you can consider:
Chimney Mount
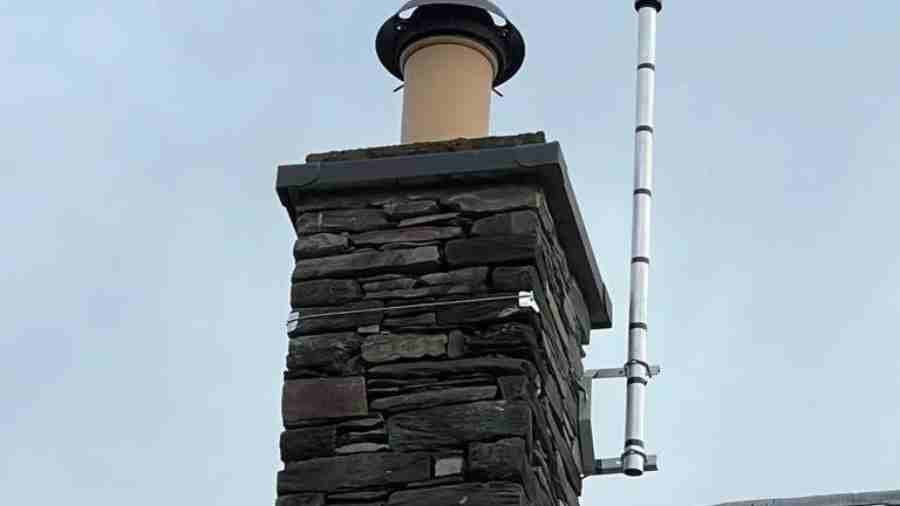
This mount uses straps to attach the dish to your chimney. It’s a good way to utilize existing structures and keep the dish elevated without additional construction.
J Mount
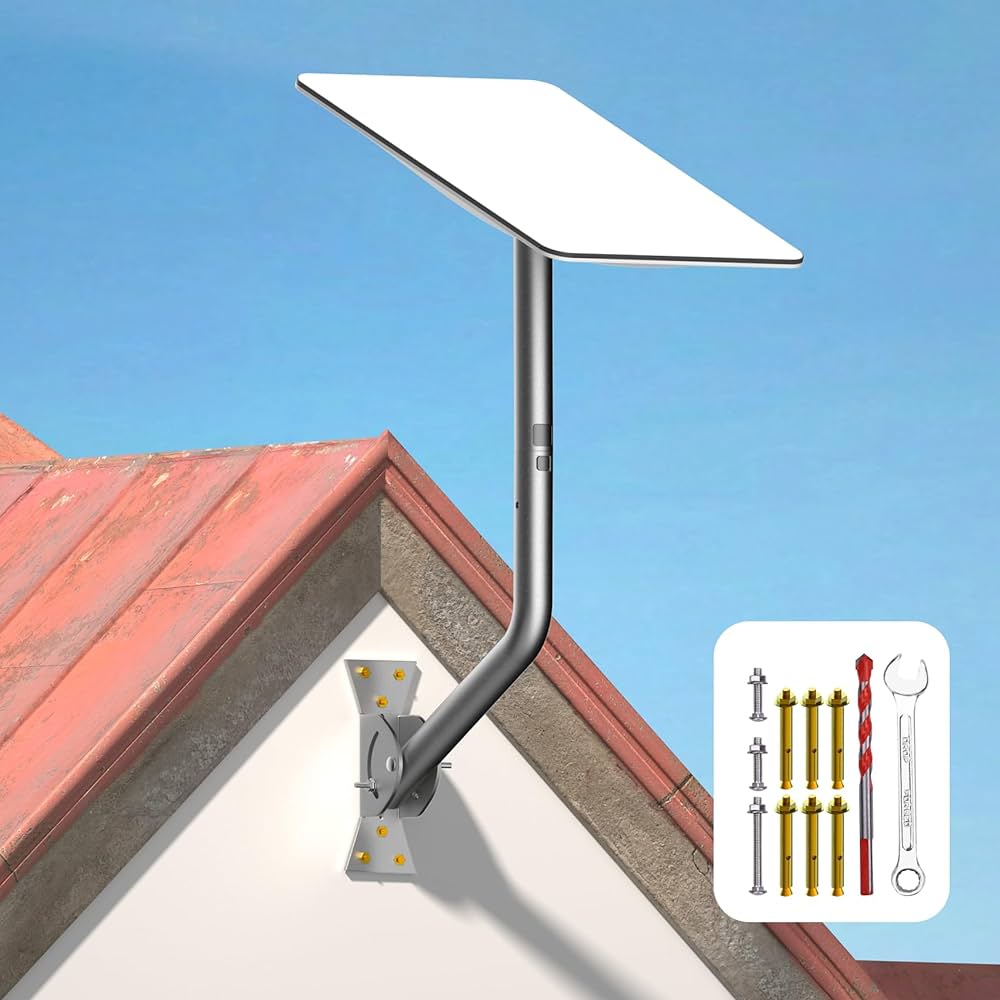
Commonly used for satellite dishes and antennas, the J-Mount is versatile and easy to install. It can be mounted on walls, roofs, or under eaves, and its shape provides additional height and clearance from obstructions.
Flashing Mount
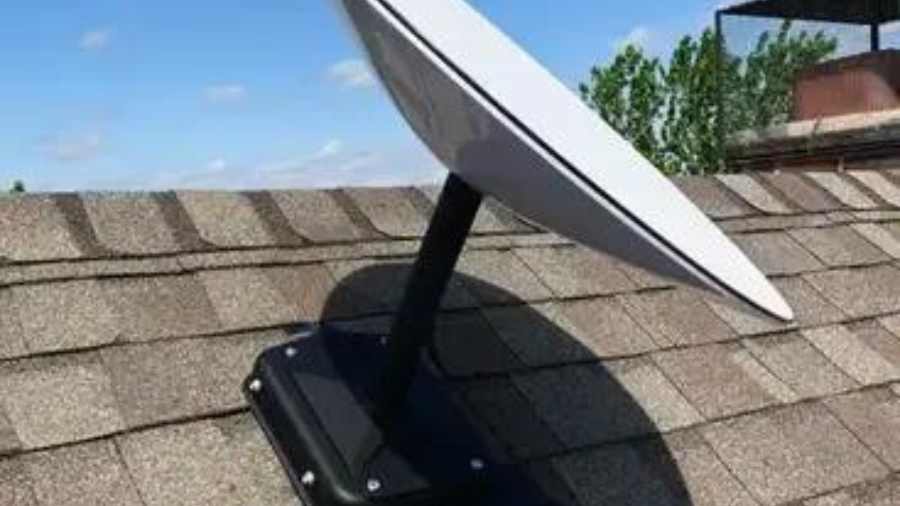
Designed to maintain roof integrity, a flashing mount slides under roof shingles to create a watertight seal. It’s perfect for avoiding leaks and is typically used on sloped roofs.
Telescoping Mount

This type of mount features adjustable poles that can extend and retract to various heights.
This adjustability allows for optimal dish positioning, ensuring a clear line of sight to the satellite without permanent structural changes.
Troubleshooting Starlink Tripod Mount Installation Issues

When installing your Starlink tripod mount, you might encounter a few common issues. Here’s how to troubleshoot them:
- Choose a flat and stable surface for your tripod. If the ground is uneven, consider relocating the tripod or using shims to stabilize the legs. Secure the tripod with nail pegs on soft ground or bolts on a hard surface like a roof.
- Check for obstructions around the dish. Use the Starlink app to perform an obstruction test and identify any potential blockages. If needed, move the dish to a location with a clearer line of sight.
- Make sure all bolts and nuts are tightened properly. If necessary, use additional bolts for extra stability. If mounting on a roof, apply sealant around the bolt holes to prevent water infiltration.
- Ensure the Starlink adapter is correctly inserted into the tripod pole. The dish mast should fit snugly into the adapter. If it’s loose, double-check the alignment and secure it properly.
- For windy areas, ensure that the tripod is securely bolted down. Adjustable legs can help you to maintain stability on slightly uneven surfaces.
FAQs Starlink Tripod Mount
Can the Starlink Tripod Mount be installed on a roof?
Yes, the Starlink Tripod Mount can be installed on flat roofs as well as RV roofs.
What should I do if I encounter issues with signal strength?
If you encounter signal strength issues, check for obstructions, reposition the tripod, secure all connections, and ensure your Starlink system is updated.
Is the tripod mount suitable for all types of ground surfaces?
No, it is only suitable for flat ground surfaces with low obstructions to the clear sky.
Where can I purchase additional accessories or replacement parts for the Starlink Tripod Mount?
You can purchase additional accessories or replacement parts for the Starlink Tripod Mount directly from the Starlink website.
How do I maintain the Starlink Tripod Mount?
To maintain the Starlink tripod mount, check for stability, clean off debris, tighten bolts, and inspect for wear or damage.
Enter your email to stay updated with offers
If you can’t see the form above, click here to open the form.

Add Comment